
As 3D Printing grows in popularity, so does the build volume of available printers and as a result, your drive to print bigger and better things! For most of us, we started off printing with small, inexpensive machines as we tested the 3D Printing waters to decide if we liked it. Inevitably, if you are like me, you fell in love with it and are now hooked. So you start tinkering and upgrading that small, inexpensive first printer. But, eventually that printer becomes obsolete or just not enough. You’ve printed hundreds of small figurines and Benchy’s but now you want to to work on a project that is bigger and it just won’t fit on your bed. So you decide to upgrade! You go from something like a Monoprice Select Mini, a DIY kit of some kind or maybe even a Creality Ender 3 (one of my favorites). Now, the Ender 3 is inexpensive with a larger build volume than a MP Select Mini (120 x 120 x 120mm) but at 220 x 220mm, you will still outgrow this over time.
You will then start looking for a printer with the build volume of 300 x 300mm or bigger. Printers with these sized build plates, something like a JGMaker A5S, a Creality CR-10S or a Tronxy X5SA, can print almost anything. Once you have one of these printers, you will notice the crazy amount of time it takes you to print these bigger, better models and parts. Prints go from taking 2, 3 or even 15 hours to multiple days! You will happily print these super long prints over and over as you enjoy the upgraded machine. Over time, these become troublesome especially when they fail. There is nothing worst that watching a successful print for 2 days only to see if fail on day three. But how do you prevent such a thing? After all, you wanted to print big and these big prints just take longer. Well, there is a solution!
Most of these upgraded, bigger printers will come stock with the same extruder, hot end and nozzle (0.4mm) that your smaller machine came with. Crazy right!? So to shorten your print times, increase the size of the nozzle to push out more plastic, faster! I have been printing for 7 years utilizing the same 0.4mm nozzles that we are all used to until lately. I decided to decrease my times buy printing with a larger, 0.8mm or 1.0mm nozzle.
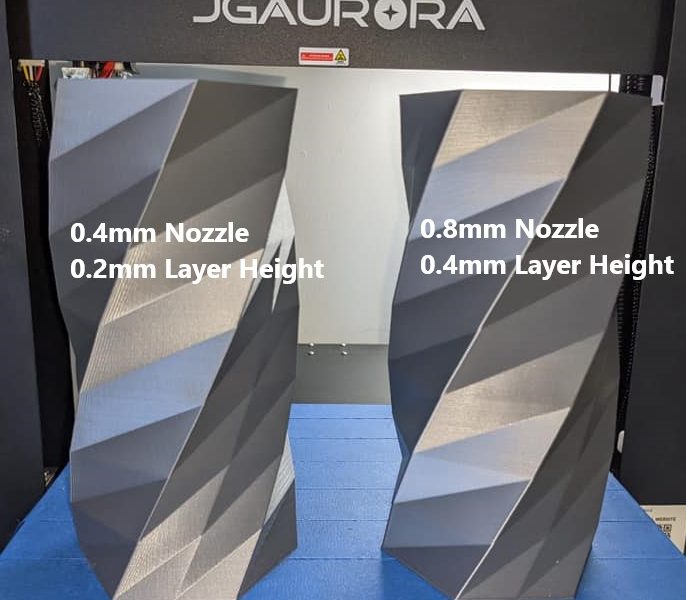
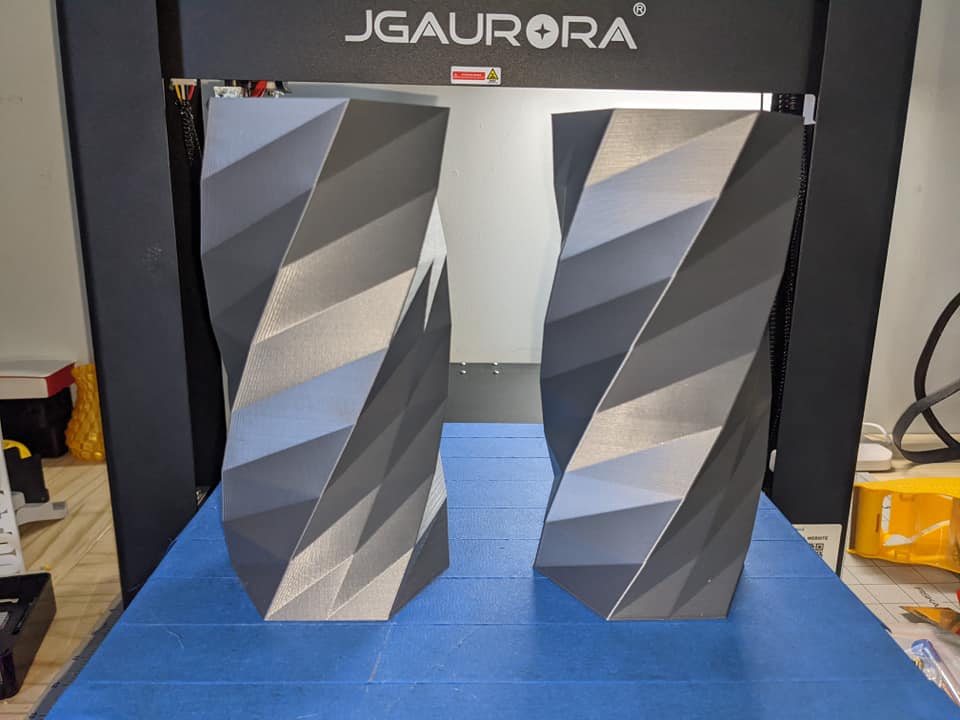
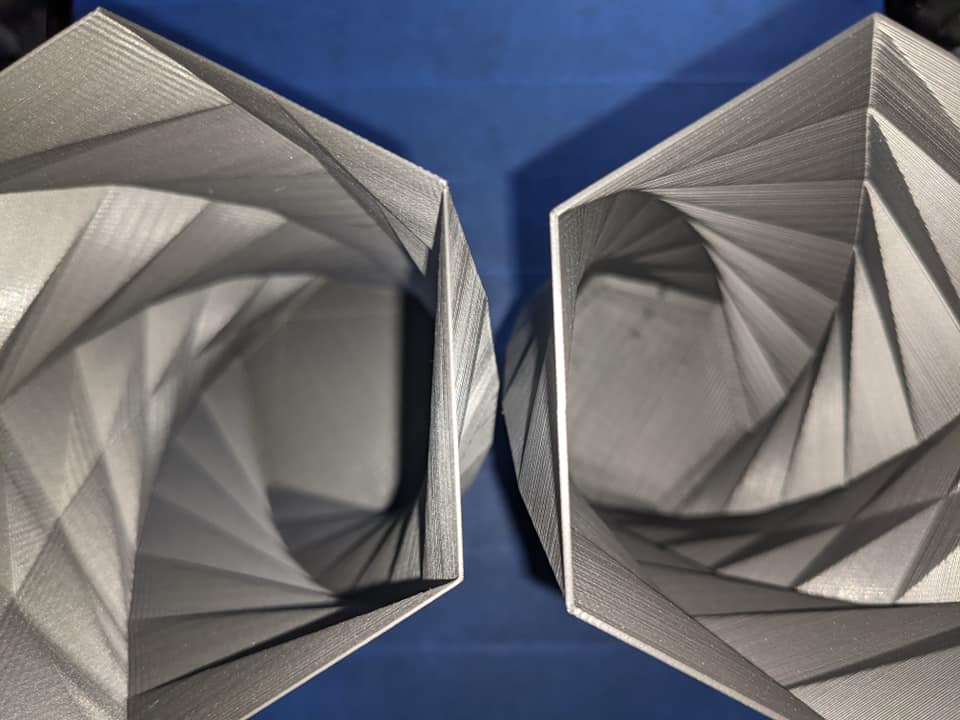
The examples below were printed on my JGAurora A5S. The one on the left was printed with a 0.4mm nozzle at a 0.2mm layer height and took 5 1/2 hours. The one on the right was printed with a 0.8mm nozzle at a 0.4mm layer height and took less than 2 1/2 hours to print. The print quality is almost identical with the 0.8mm nozzle producing a much stronger print!
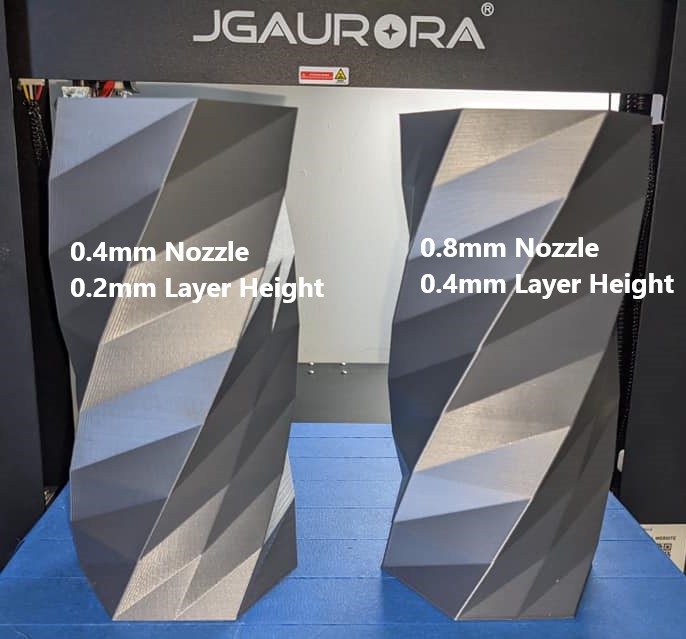
I found with the 0.8mm nozzle, the most important settings were temperature, wall count (not vase mode), infill overlap and print speed. The first settings changed, was increasing the infill overlap to 50%. At the lower temps, there was under extrusion because the plastic could not melt fast enough. Once I increased the hot end temperature to 220 degrees, the quality improved significantly. The print speed also seemed to play an important factor. I was printing much slower at 25mm/s but even with the slower print speed, my overall print time was cut in half. Larger nozzles for big prints can definitely help reduce time and maintain quality.
Thanks and happy printing!
– MoJee
