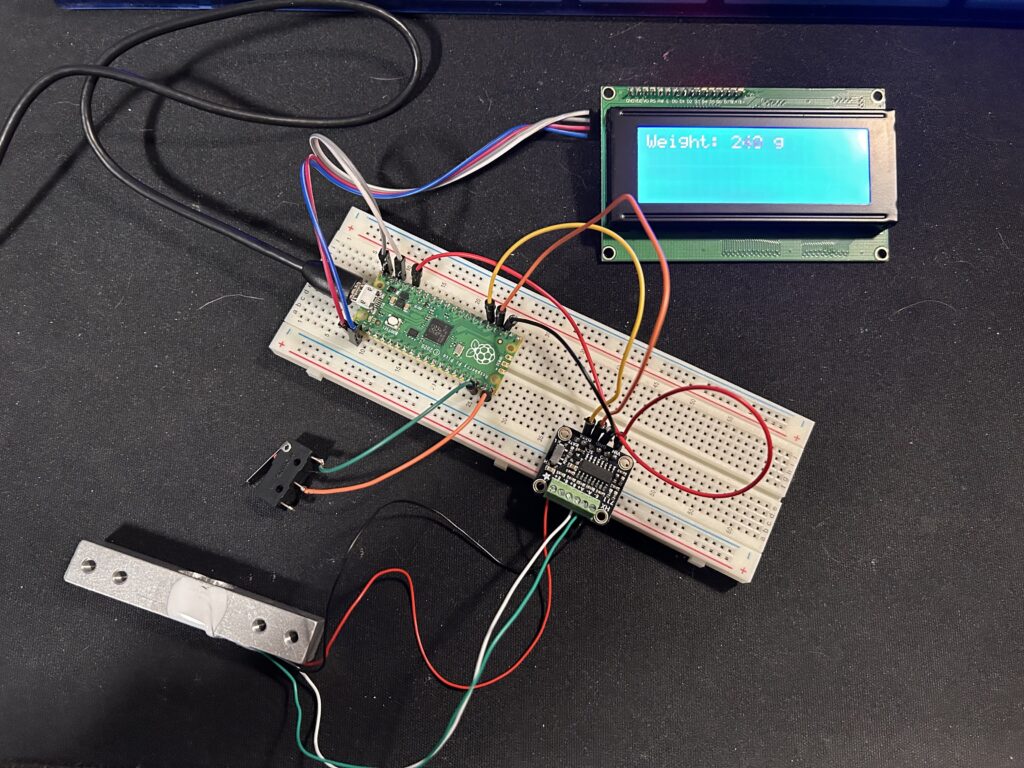
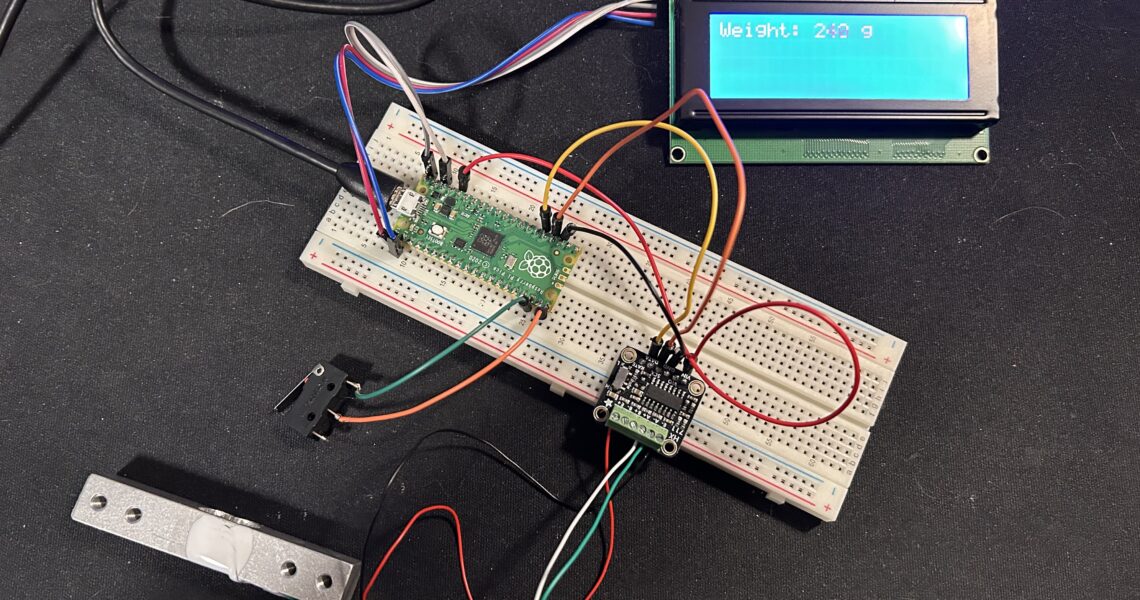
Creating a digital scale is a fun and practical project for anyone interested in electronics and programming. In this guide, we’ll walk through building a digital scale using the Raspberry Pi Pico, an HX711 load cell amplifier, an I2C LCD, and a few supporting components. By the end, you’ll have a working scale with a zeroing button, calibration, and a clear LCD readout.
Components You’ll Need
- Raspberry Pi Pico
- HX711 Load Cell Amplifier Module
- Load Cell (e.g., 5kg or 10kg)
- I2C LCD Display (e.g., 16×2). The 1602A or 2004A LCD Displays both work.
- Momentary Push Button
- Breadboard and Jumper Wires
- USB Cable (for powering the Pico and uploading code)
Wiring Diagram
Below is a high-level overview of how to connect the components. Refer to your specific load cell and HX711 module pinout for details.
- HX711 to Raspberry Pi Pico:
- CLK (HX711) → GPIO 18 (Pico)
- DAT (HX711) → GPIO 19 (Pico)
- VCC (HX711) → 3.3V (Pico)
- GND (HX711) → GND (Pico)
- LCD to Raspberry Pi Pico (I2C):
- SDA → GPIO 0
- SCL → GPIO 1
- VCC → 5V
- GND → GND
- Button to Raspberry Pi Pico:
- One leg → GPIO 15
- Other leg → GND
Coding the Project
The core of this project is a Python script that:
- Calibrates the scale using a known weight.
- Reads data from the HX711 load cell.
- Displays the weight on the LCD.
- Includes a button for zeroing the scale.
Key Features
- Automatic Calibration: The script guides you to calibrate the scale with a known weight.
- Zeroing Button: Pressing the button resets the scale to zero.
- Persistent Calibration: Calibration data is saved and reused on future power-ups.

Step-by-Step Assembly
Step 1: Connect the HX711 to the Raspberry Pi Pico
Connect the HX711 to the Pico following the pin mapping below.
| HX711 Pin | Raspberry Pi Pico Pin | Description |
|---|
| VCC | 3.3V (Pin 36) | Power supply |
| GND | GND (Any GND Pin) | Ground connection |
| DT (Data) | GPIO 19 (Pin 25) | Data output from HX711 |
| SCK (Clock) | GPIO 18 (Pin 24) | Clock input for HX711 |
Step 2: Connect the Load Cell and HX711
Insert the load cell wires into the HX711 following the pins mapping below.
| Load Cell Wire Color | HX711 Pin | Description |
|---|
| Red | E+ | Excitation positive |
| Black | E- | Excitation negative (ground) |
| Green | A+ | Signal positive (output) |
| White | A- | Signal negative (output) |
Step 3: Set Up the I2C LCD
Wire the LCD display to the Pico using the I2C protocol. Make sure to check the address of your LCD (e.g., 0x27) using an I2C scanner script.
| I2C LCD Pin | Raspberry Pi Pico Pin | Description |
|---|
| VCC | 5V (Pin 36) | Power supply |
| GND | GND (Pin 38) | Ground |
| SDA | GPIO 0 (Pin 1) | I2C data line |
| SCL | GPIO 1 (Pin 2) | I2C clock line |
Step 4: Add the Button
Connect a momentary push button to GPIO 15 of the Pico, with the other leg connected to GND. The button will enable zeroing functionality.
| Button Pin | Raspberry Pi Pico Pin | Description |
|---|
| Leg 1 | GPIO 15 (Pin 20) | Digital input for button press |
| Leg 2 | GND (Any GND Pin) | Ground connection |
Step 5: Upload the Code
Use your favorite MicroPython IDE (e.g., Thonny) to upload the main.py code to the Pico. Once uploaded, the scale will be ready for calibration. Make sure to import the hx711 and pico_i2c_lcd.py libraries to the Pico. You can use any of the multiple hx711-micropython and i2c_lcd libraries available just make sure that you main.py code matches the names of the libraries uploaded to the Pico.
import time
from machine import Pin, I2C
from pico_i2c_lcd import I2cLcd  # Import your I2C LCD class
from hx711 import HX711  # Import your HX711 class

# Set up I2C for the LCD
i2c = I2C(0, sda=Pin(0), scl=Pin(1), freq=400000)  # Adjust pins as needed

# LCD setup
lcd = I2cLcd(i2c, 0x27, 2, 16)  # Adjust the I2C address and dimensions

# Set up HX711
hx711 = HX711(clock=Pin(18), data=Pin(19), gain=128)  # Adjust pins for HX711

# Tare the scale initially
hx711.tare()

# Set up button for zeroing the scale
zero_button = Pin(15, Pin.IN, Pin.PULL_UP)  # Change GPIO 15 to your chosen pin

# Function to read average raw value
def read_average(times=10):
    total = 0
    for _ in range(times):
        total += hx711.get_value()
    return total // times

# Function to calibrate the scale
def calibrate(load_cell_weight):
    print("Taring the scale...")
    hx711.tare()  # Tare the scale
    time.sleep(2)

    print("Place known weight on the scale.")
    time.sleep(2)

    print("Reading raw value for the known weight...")
    raw_value = read_average(10)  # Read raw value several times to get an average
    print(f"Raw Value with known weight: {raw_value}")

    # Calculate scale factor
    scale_factor = raw_value / load_cell_weight
    print(f"Scale Factor: {scale_factor}")

    return scale_factor

# Known weight for calibration
known_weight = 200  # Adjust to the weight you will use to calibrate (grams)

# Start calibration
scale_factor = calibrate(known_weight)

# Zero button debounce function
def is_button_pressed():
    time.sleep(0.05)  # Debounce delay
    return not zero_button.value()  # Button pressed when value is LOW

# Main loop
while True:
    if is_button_pressed():  # Check if the button is pressed
        lcd.clear()
        lcd.putstr("Zeroing scale...")
        hx711.tare()  # Zero (tare) the scale
        time.sleep(1)  # Give time for taring
        lcd.clear()

    # Read weight and display
    weight_raw = hx711.get_value()
    weight_grams = weight_raw / scale_factor
    weight_grams_int = int(weight_grams)

    lcd.clear()
    lcd.putstr(f"Weight: {weight_grams_int} g")
    time.sleep(1)
Calibrating the Scale
- Place the scale bed on the load cell.
- Run the program. The LCD will display a message prompting you to calibrate.
- Place a known weight (e.g., 200g) on the scale. Edit the known weight if using a different value.
- The scale will calculate the calibration factor and save it for future use.
Testing the Scale
- After calibration, the LCD will display “Ready.”
- Place an object on the scale, and the weight will be shown on the LCD in grams.
- Press the zeroing button to reset the scale to zero.
Troubleshooting
- LCD Stuck at “Starting…”: Ensure the I2C address is correct and the LCD is properly connected.
- Incorrect Weights: Recalibrate the scale with a precise known weight.
- Button Not Working: Check the GPIO connection and debounce logic in the code.
Project Extensions
- Add Unit Conversion: Allow switching between grams and ounces.
- Log Data: Record weights over time to a file or send data via serial.
- Enhance Accuracy: Use a higher-precision load cell or average more readings.
Conclusion
This Raspberry Pi Pico digital scale is a rewarding project that teaches core concepts of embedded systems, I2C communication, and sensor integration. Whether for fun or practical use, it’s a great way to explore microcontroller programming.


